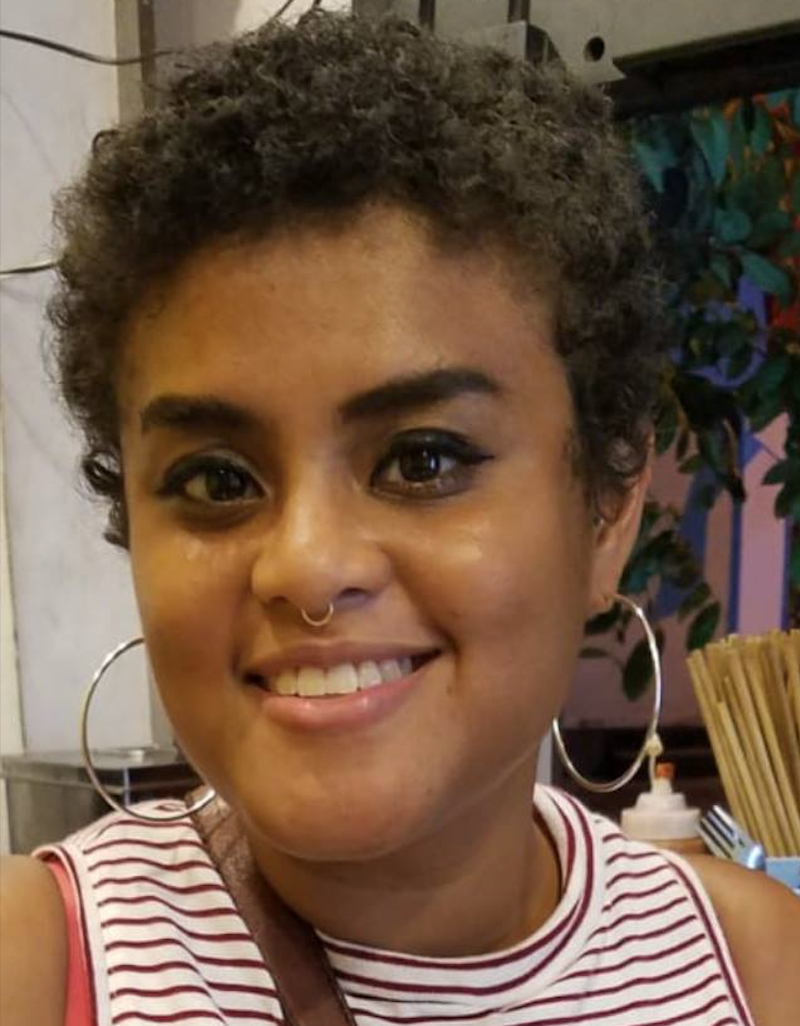
Pie Party: a pie in photos.

A few weeks ago, I got an invite on facebook to participate in Gluten-Free Girl’s virtual pie party. By a lovely coincidence, the pie party on July 5 was to occur the day before Pie Day at my office. Though I baked the pie on Tuesday night, I did not manage to assemble this post until, well, today.

I’m still pretty certain that a late pie is better than no pie at all.

This is the first gluten-free pie crust I’ve made that I really like; I used my standard pie crust recipe, and subbed in a gluten-free all-purpose flour blend and two teaspoons of xanthan gum. It got a little bit hard around the edges, and that’s the one thing I’d like to correct for next time. Otherwise, it was pretty much perfect.

The filling is one of my favorites: peach-blueberry. I added a few gooseberries for a twist, too. It tasted like summer.

DSC_0023


Getting My Groove Back Pie


DSC_0032


DSC_0010

A taste of home: a photo essay.

Though I make my own variation of spaghetti sauce rather than following my mom’s recipe, this process reminds me of family and of growing up. I strongly identify with the foods of my heritage – part Polish, part Italian – and I refuse to purchase jarred pasta sauce because I grew up with homemade. There is something beautiful about cooking food with a deep family connection.

Italian pepper.


Chopped.


Cloves.


A taste of August 2010.


Basil.


Saucy.


Dinner is served.


Yum.

So much rhubarb, so little time.

I think we pretty safely established last year that I love rhubarb. Given that, it should be no surprise that I was completely on board when my friend Lauren suggested that we bake rhubarb upside-down cake before our recent Sunday evening date to see Bridesmaids.

That Saturday – the day of The Rapture That Was Not, we met at the farmer’s market to purchase the goods. We decided to go all out even though the world might not exist for us to bake the next day, heading directly to my favorite stand and purchasing that tart, wonderful fruit. We thought we were done, as we had the main ingredient for the cake.

And then…we came to the strawberries. You know my weakness for strawberries. The strawberries whispered to me, tempting me with their sweet summery scent, and Lauren mentioned that she’d never really had one of my pies. Before I knew it, I had berries in my bag and a little less money in my pocket. I love feeding people pie.

First pie of 2011.

Thankfully, the world still existed on Sunday, so we gathered around noon and began to chop fruit (her) and make dough (me). We  made a smaller version of last year’s victory pie (recipe via that link) – this time, with a gluten-free crust – and I still think it’s my favorite strawberry-rhubarb pie ever. If Lauren‘s longing gaze is any indication, she agrees.

Lauren gazes longingly.

But this isn’t about the pie.

Once the pie was in the oven, we tackled The Cake. We broke out the hand mixer to get the right consistency. We zested. We macerated the rhubarb. We heated butter and brown sugar for the perfect topping. We subbed a gluten-free all-purpose flour blend from Bob’s Red Mill for the flour in the cake. We were ready.

Then: a small error in judgment. We decided that my 9-inch regular cake pan would work fine, and we put my 10-inch springform pan back in the cabinet. At the time, this seemed to make sense – until we put the toppings in the pan, followed by the batter, and it looked…really full. Of course, we had no choice but to move forward at this point. The clock was ticking, we had a date for Bridesmaids, and obviously, we couldn’t waste all of the perfectly delicious cake elements. We forged ahead, placing a cookie sheet underneath the cake pan when the cake went into the oven.

That, dear friends, was a wise choice.

Cakesplosion!

An even better decision, however, was when we pulled that whole mess out of the oven to test the cake, and realized that:

a) the overflow batter was basically done baking, and
b) we could eat that with pie filling on top.

Overflow cake covered with strawberry-rhubarb pie filling.

That was just what we needed to tide us over until the rhubarb upside-down cake, in all its glory, was ready. Ten minutes before we needed to leave, we removed The Cake from the oven, danced around my kitchen, and took this photo for you to see its beauty.

Rhubarb upside-down cake.

Lessons learned:

  • Lauren and I bake well together.
  • You’d never guess that this cake was gluten-free; that flour substitution worked beautifully.
  • It’s probably smarter to use the springform pan like the recipe suggests.
  • This cake makes an excellent movie snack!

Happiness is…

I’m having an amazing food week.

When I’m cooking on a regular basis, most weeks are pretty fantastic food-wise. This is not to say that I’m the most incredible cook – though I certainly hold my own in the kitchen. Rather, it’s about the fact that when I cook for myself, I tend to select the foods that bring me the greatest joy or fondest memories, and this week has held a lot of good food memories and rich tastes.

Strawberry season.

The first, of course, is strawberry season. I said it last year and I’ll say it again: I love everything about them. I love those sweet little red gems. I don’t care that they’re $8/quart at the farmer’s market right now; I will pay it. I can’t walk by a stand, smell the scent of fresh strawberries, and not purchase them. I ate an entire pint on Friday and bought more on Saturday. I’m certain that strawberries are one of nature’s most perfect foods when purchased locally and in season. Tomatoes are up there as well.

Rainy day pancake breakfast.

When I was growing up, we often had pancake breakfast on Sunday morning. I don’t usually get pancake cravings these days, though since I stopped eating gluten in January, I’ve been craving carbs a lot more. This was the first successful batch of pancakes I’ve ever made – for some reason, pancake batter and I don’t usually get along – and it was nice to feel a Sunday tradition again. Paired with local bacon and topped with apple vanilla bean preserves that the lovely Autumn gave me, this was utterly delicious. Plus, I made enough for leftovers…

This is how you start the week right.

* * * * *

What foods bring you the most joy?

Polenta, how I love thee.

Polenta, ready to eat

I think it’s time that I declared this to the world: I love foods made with cornmeal. Cornbread? Fantastic. Corn muffins? Delicious – especially with some fresh fruit mixed in. Grits? Be still, my heart. And then…there’s polenta.

A few years ago, I was making polenta on a regular basis. It was a staple in my diet thanks to its affordability and versatility. A cup of cornmeal, once cooked, makes four to six hearty servings, and it can be served as breakfast, lunch, or dinner depending on the topping. So why did I stop making it? Good question. Thankfully, I remedied this last week as I work to stick to a tighter grocery/dining out budget.

Polenta with sauteed mushrooms and asparagus.

My system has been to make a batch of polenta at the beginning of the week, and then throughout the week as I’m cooking dinners, I’ll have a variety of sauces and other toppings to bring with the polenta for lunches. In the past week and a half, I’ve topped my lunches with eggs over-easy and arugula; sausage, olives, and goat cheese; tomato sauce with ground beef; and, my current favorite, sauteed asparagus and mushrooms with lemon juice, butter, and thyme.

That last one is the perfect meal for spring, and I can’t resist eating it.

Polenta

2 c water
1 c unsweetened almond milk (or milk of your choice)
1 c polenta (corn grits)
2 tbsp salted butter
black or white pepper

Combine water and almond milk in a medium-sized pot, and bring to a boil over high heat. When liquid reaches a rolling boil, turn heat down to low and stir in polenta. When polenta and liquid are combined, add butter and stir. Continue to simmer, stirring regularly, until polenta reaches a thick oatmeal consistency. (Note: The instructions I’ve read say that polenta will take 20-30 minutes to cook. Mine usually reaches the thick consistency within 10 minutes. Cooking time may vary for you.)

When polenta has thickened, add pepper to taste and stir. Turn off heat and serve.

You can also pour the polenta into a rectangular baking dish – mine is 1-1/2 quarts – and refrigerate, covered overnight. After that, you can slice pieces, reheat, and serve!


Lemon Butter Asparagus and Mushrooms

3 c sliced crimini mushrooms
2 c asparagus, chopped into one inch segments
2-1/2 tbsp salted butter
2 tbsp olive oil
1 tbsp lemon juice
1/2 tsp dried thyme
pepper to taste

In a non-stick pan, heat 2 tbsp olive oil and 2-1/2 tbsp salted butter. When butter has melted, add asparagus and mushrooms. Saute until asparagus is tender, about 7-10 minutes. Add lemon juice, thyme, and pepper. Serve over polenta or as a side dish.

Simple sewing: yoga mat bag.

DSC_0239

I purchased Lotta Jansdotter’s Simple Sewing ages ago; I suppose it was around the time I got my sewing machine. I was drawn to the clean designs, the beautiful fabrics, and the idea of sewing lovely gifts for my family and friends.

As you can guess, that didn’t happen. I bought fabric to make some things, and then for whatever reason, like happens so often, life and other hobbies got in the way. The book sat on my shelf; the fabric stayed in a plastic bin under my bed. And I went for years without an apron, cute potholders, and charming totes.

I had my first free weekend post-yoga teacher training over Easter, and out of nowhere, I had an overwhelming desire to sew. I think it’s the time of year; the warmer weather often seems to have me wanting to work with fabric. Things that are not good when I’m itching to sew: a project that takes forever, like the quilt I started…a while ago. I pulled out Simple Sewing and started flipping through – and I remembered that I could really use a yoga mat bag.

Easy pattern? Check.
Heavier-weight cotton? Check.
Several hours of sewing time? Check.
Sold!

DSC_0248

I made a few changes to the pattern to make it a little more finished – and thus, a little less simple. (Note: I am not an advanced sewist by any means, so my changes were still within the realm of fairly basic.)

First, I changed the pocket to make the outside and the inside of it two different fabrics; the original pattern called for one longer piece of matching fabric folded over and sewed onto the bag. To do this, I halved the size of the pocket fabric called for by the pattern, then added a 1/2-inch seam allowance to that number. Placing the two pocket fabrics right side together, I first sewed my extra seam, and then I followed the pattern for the rest.

Next, I added a lining to the inside of the bag. I’m not completely thrilled with how I did it, as I mistakenly assembled it so that the seam allowance isn’t hidden, but then again, who’s really looking inside the bag that closely anyway? My approach was to cut the lining fabric the same size as the outer fabric, and then sew the bag together as if the two pieces were one. It worked out quite well except for that pesky seam allowance issue.

Finally, rather than use a cord of some type for the tie closure at the top, I sewed my own from the pocket and lining fabric. I cut a piece of fabric the suggested length of the cord and about 1-1/2 inches wide. I folded the two lengthwise cut edges so that they met at the center, and then folded the whole length in half (hiding the cut edges) and stitched it all together. Once I threaded it through the top, I tied a knot in each end.

I’ll definitely be using this book again – and the bag all the time!

Gluten-free Cadbury Creme Egg brownies.

DSC_0234

A few weeks ago, a friend of mine mentioned these brownies, and I knew I had to adapt them to be gluten-free. I’m a sucker for Cadbury Creme Eggs; they’re one of the seasonal treats that I look forward to most every year. I also love baking brownies, as they’re quick, a perfect chocolate fix, and easily made sans wheat flour.

As I looked over the original recipe, I knew how I’d easily adapt the flour mixture; my go-to is to swap in 2/3 white rice flour and 1/3 tapioca flour, and I figured that would work perfectly here. I knew I only had sweetened cocoa powder on hand, so I decided to cut back the amount of sugar by 1/2 cup – something I’d probably do even with unsweetened cocoa powder. These babies are sweet, and they don’t really need the extra sugar. Mine came out with my favorite fudge-y brownie texture, and held together quite nicely once you scooped them out of the pan.

And remember: Easter is only a few days away, so discounted candy will be up for grabs soon! I may have to stock up on the caramel eggs for my next batch…

DSC_0239

Gluten-Free Cadbury Creme Egg Brownies (adapted from Gingerbread Bagels)

5 Cadbury Creme Eggs, halved (9 halves for the brownies, 1 for your mouth)
1/2 c white rice flour
1/4 c tapioca flour (tapioca starch)
1/2 c sweetened cocoa powder
1/4 tsp finely-ground sea salt
1/2 c brown sugar
1/2 c sugar
1/2 c (1 stick) unsalted butter, melted
1 tbsp vanilla extract
2 eggs
1/2 c bittersweet chocolate chips (I used Ghirardelli 60% Cacao Bittersweet Chocolate Chips)

Preheat oven to 350 degrees Fahrenheit and lightly grease a 9×9 inch baking pan. Slice Cadbury Creme Eggs in half using a paring knife. Set nine halves aside; eat one.

Blend flours, cocoa powder, and sea salt thoroughly in a small bowl. Set aside.

Combine sugars, melted butter, and vanilla extract in a medium bowl. Stir thoroughly with a spatula until well-mixed. Add eggs one at a time, mixing well after each.

Add half the dry ingredients to the wet, stirring until just combined, then add the other half. When dry mixture is integrated, add chocolate chips, folding them into the batter.

Pour batter into baking pan, spreading it with a spatula to cover the bottom of the pan evenly. Bake for 20 minutes, remove pan from oven, and neatly press the Cadbury Creme Egg halves into the brownies. Bake for 5 more minutes, or until a toothpick/knife inserted into the center comes out clean.

Cool the brownies before cutting.

On knitting sweaters.

DSC_0240

I am not the world’s fastest knitter – far from it, in fact. Knitting is about process for me: the feel of yarn between my fingers, the repetitive motion of the needles, the time spent with friends talking over projects in progress, the meditative state of knitting alone. Even though I feel like I finish so few projects, I really do love to knit.

On Ravelry, a website that is a mix of social networking and knitting/crocheting resources, there is a community for people who are participating in IntSweMoDo – the International Sweater-a-Month Dodecathon. In other words, it’s a group of people who are planning on knitting at least 12 sweaters in a year. One of the girls from my knitting group participated in this last year, and somehow, over the course of discussing it at knitting and looking through many, many photos of 2010′s completed sweaters, I decided that it would be a good idea for me to join as well.

DSC_0233 As you may or may not know, I’ve spent the past two months completing my yoga teacher training (aka one of the best ways I’ve ever spent my time and money), which has left me with minimal free time. So far, I’ve completed one sweater, and as you can see here, I have two more in progress. That puts me at 3.5 months in with about 2.5 completed sweaters. The sweater at the top, Through the Keyhole, is about 90% there since mine will have short sleeves; the one to the right, Lace Leaf Pullover, is somewhere around 50-60% done.

I certainly still have a chance of hitting 12, though if I’m being realistic, I won’t make enough time to knit to get there. So why participate at all, then?

Because every stitch gets me closer to a completed sweater. Even if the goal is lofty, I’ll still end up with at least a few lovely, handmade garments by December 31, 2011. Because I love playing with colors and textures. Because it’s fun to learn how to adapt patterns so that they fit the way I like. I’m thin and have absurdly long arms, so every sweater I knit means another sweater that will fit my torso and have sleeves that reach my wrists.

And, most importantly, because in the end, it’s about the process, and I love that.

Homemade deodorant: a year later.

Homemade deodorant

Okay, it hasn’t been quite one year, but I’m fast approaching the time when I switched to using homemade deodorant exclusively. After going through all four seasons with this mixture of four simple ingredients, I can safely say that this is the single most effective deodorant I’ve ever used. Though I still sweat when I wear it, it also blocks odors better than any antiperspirant I’ve tried – and I’ve tried a lot.

Let me backtrack. A while ago, I discovered Amy Karol’s deodorant recipe. I finally purchased all of the ingredients and made it last spring. It worked well, but I wasn’t in love. Due to the mixture of the shea butter, cocoa butter, and essential oils, the smell was a bit…odd*, though not strange enough to stop me from using it. The deciding factor that it wasn’t right for me was that it kept leaving white stains in the armpits of my black and charcoal shirts after I’d washed them. Since I wear mostly dark colors, that wasn’t going to fly.

Enter this recipe. It contains four easily purchased ingredients: coconut oil, baking soda, arrowroot starch, and essential oil. One batch lasts me over four months; it doesn’t stain my clothing; and I don’t get any odor during the day. (I do reapply daily after I shower in the morning, as when I wake up, it’s a good idea.)

I have had a few friends try it and say that they’ve found it abrasive and/or irritating, though I’ve not really experienced this. I know that when I had some irritation with Amy Karol’s recipe, it was after I reapplied multiple times in one day, on a day that I’d shaved my armpits. In that instance, I washed my armpits and coated them with baby powder before heading to bed. It may be worth noting that I only shave my armpits about once a week, so my skin may be less sensitive.

In terms of essential oils, I use half grapefruit and half lavender; otherwise, I follow the amounts as written. I tried adding more coconut oil once and it was runny and generally not so great. After I mix the ingredients, I put them in a half-pint mason jar (a quarter-pint jar would probably be sufficient), chill the deodorant in the fridge for a few hours, and then store at room temperature. In the summer, it tends to separate with the heat, so I’ll mix it up again before applying.

If you’ve been curious to try homemade deodorant, there’s no time like the present! If you give it a go, I’d be curious to hear whether it worked for you.

*I used grapefruit and lavender rather than the orange and ylang ylang she recommended, so that may have been a contributing factor.

30 minute oats.

DSC_0227

My internet friend Robyn loves overnight oats. I’d never heard of them before reading her blog, and after seeing all of her delicious posts, I was intrigued.

The problem is, I am pretty terrible at prepping food for the next day before I go to bed. Embarrassing confession: I’m one of those people who occasionally often falls asleep on the couch while reading or internetting, and then I’ll wake up, brush my teeth, and promptly settle into bed.

Morning is the time when I really shine.

Because I was so curious about the magic of overnight oats, I decided to see whether I could make them happen in the morning with delicious results. The answer: YES.

This has become my go-to weekend breakfast, as it’s substantially cheaper than cereal, more filling, and just as easy. I mix up the ingredients before I shower, and by the time I’m ready, my breakfast is waiting. Delicious food before heading out for the day is a good thing!

30 Minute Oats

1/2 cup rolled oats
1/2 cup almond milk (or whatever you prefer)
1 tbsp agave nectar*
1/4 cup slivered almonds*
1/4 cup berries (frozen from last summer!)*

Combine all ingredients in a bowl. Mix thoroughly and place in refrigerator for approximately 30 minutes. Stir once more and enjoy!

*These are my standard ingredients, though I sometimes add in shredded coconut or nut butter. Inspired by Robyn, I may try them with cocoa powder soon.

Note: Picture taken prior to mixing to avoid photographing a bowl of mush!

Related Posts Plugin for WordPress, Blogger...